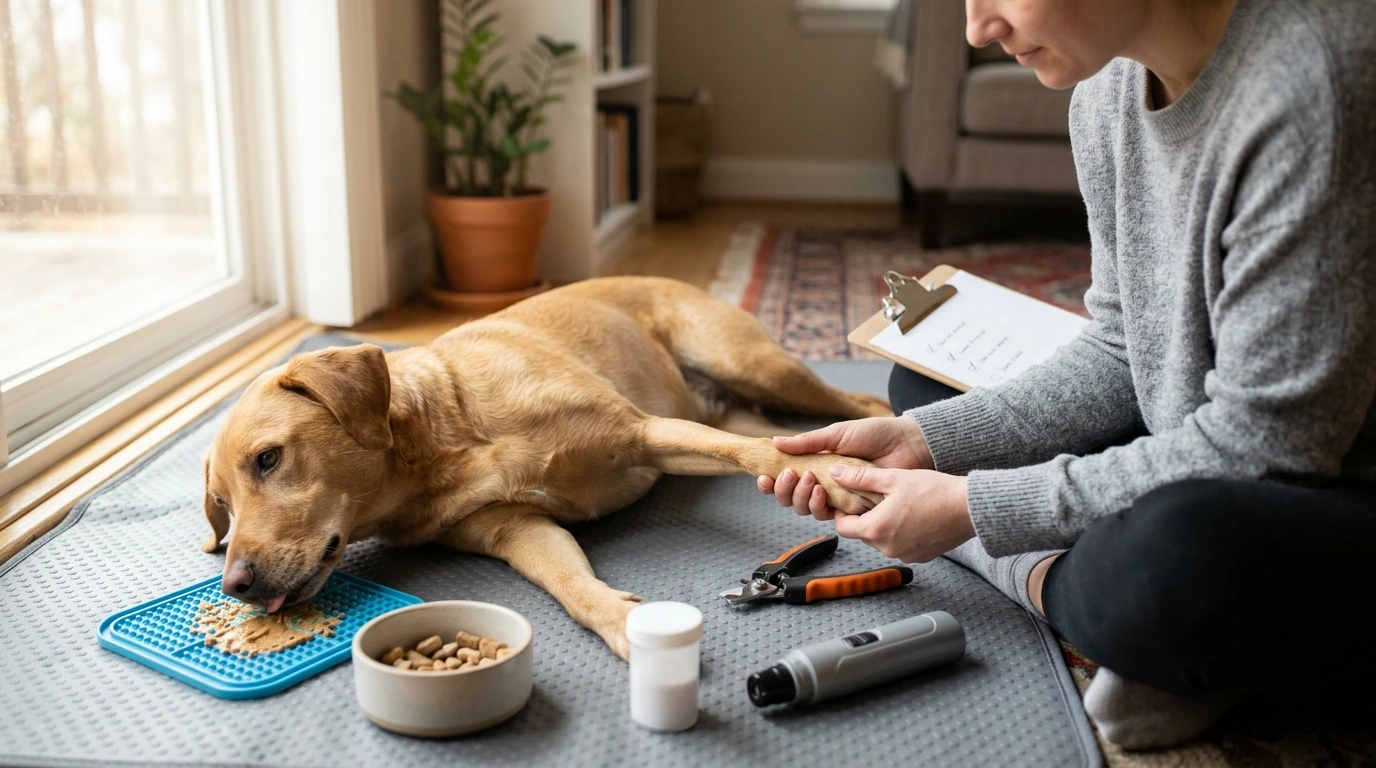
Regular nail trims support comfortable walking, healthy posture, and fewer snag-and-split accidents. A calm setup, the right tools, and a simple checklist make trimming safer—especially for dark nails or wiggly pups. The goal isn’t perfection in one session; it’s steady, low-stress progress that keeps nails short enough to prevent pain and slipping.
Where and when you trim matters as much as how you trim. Choose a quiet, well-lit spot (bright overhead light plus a flashlight angled at the nail can help). Plan the session after a walk or playtime when your dog’s energy is lower, and skip trimming immediately after exciting visitors or noisy events.
Set yourself up for frequent rewards. Keep high-value treats within reach and reward stillness and cooperation—not just the moment after a cut. For large dogs, a non-slip mat on the floor helps them feel stable; for small dogs, a sturdy table with a grippy mat can protect your back and improve control. If your dog is anxious, spend a few days practicing gentle paw handling for a few seconds at a time before introducing clippers or a grinder.
A simple tool kit prevents scrambling mid-trim (which often spikes stress for both of you). Start with sharp, properly sized nail clippers: scissor-style often works best for larger dogs, while guillotine-style can work for small-to-medium dogs if the blade is sharp and the opening fits the nail.
A nail grinder is optional but useful for smoothing edges and removing tiny amounts—especially helpful with black nails where the quick is harder to see. Keep styptic powder or a styptic pencil within arm’s reach before you begin. Add treats plus a lick mat or stuffed toy to create a positive association and keep your dog’s head busy. A towel or blanket can help small dogs feel secure with a gentle wrap, but never restrain tightly or in a way that limits breathing.
| Situation | Best option | Why it helps |
|---|---|---|
| Clear/white nails | Clippers or grinder | The quick is easier to see; standard trims are straightforward. |
| Black/dark nails | Grinder + strong light | Allows tiny reductions and safer control when the quick is hard to spot. |
| Dog hates the clip sound | Grinder (low speed) or silent clippers | Reduces startle response from loud snapping. |
| Thick nails (large breeds) | Heavy-duty scissor clippers | More leverage and cleaner cuts when blades are sharp. |
Dog nails have a sensitive core called the quick, which contains blood vessels and nerves. Cutting into it can cause pain and bleeding, so the safest approach is to trim gradually. On light-colored nails, the quick often appears as a pink area inside the nail; aim to cut a small distance before it.
On dark nails, use a brighter light and look at the cut surface as you go. A chalky white or gray center generally indicates you’re still in safer territory. If the center begins to look darker or moist, you’re getting close to the quick and should stop or switch to tiny reductions with a grinder.
Don’t forget dewclaws (the side nails). They often don’t wear down naturally and can become overgrown faster than the other nails, especially on indoor dogs.
Start with a “one nail wins” mindset. If stress rises, stopping early is a success—consistency beats forcing a full set. Hold the paw gently but securely, supporting the toe you’re trimming to reduce sudden movement. Avoid twisting joints or pulling the leg into an uncomfortable angle.
| Dog type / lifestyle | Typical trim frequency | Quick tip |
|---|---|---|
| Active on pavement | Every 3–5 weeks | Rear nails may still need trimming even if fronts wear down. |
| Mostly indoors / soft ground | Every 2–4 weeks | Expect faster growth and less natural filing. |
| Senior dogs | Every 2–4 weeks | Reduced activity can lead to faster overgrowth and joint strain. |
| Puppies learning grooming | Weekly practice + tiny trims | Frequent low-stress sessions build lifelong tolerance. |
For additional step-by-step visuals and safety tips, see the American Kennel Club guide to trimming dog nails and VCA Animal Hospitals’ overview of nail trimming.
Aim for nails that don’t click loudly on hard floors and don’t push the toes sideways. Trim in small increments to stay safely away from the quick, especially for dark nails.
Use bright light and remove tiny amounts, checking the nail’s cut surface as you go. A chalky center is generally safer, while a darker or moist-looking center suggests you’re getting close—using a grinder can add control.
Most dogs need trims every 2–5 weeks depending on activity level and the surfaces they walk on. Dewclaws often need more frequent attention because they don’t wear down naturally.












Leave a comment