HomeBlogBlogPro Pet Nail Clippers: Cleaner, Safer Trims at Home

Pro Pet Nail Clippers: Cleaner, Safer Trims at Home

a1c3afd223e501c4de0df5415c134859.jpeg-350x350.webp

Professional Pet Nail Clippers: Safe, Clean Trims at Home

Overgrown nails can cause discomfort, change posture, snag on fabrics, and make everyday walks or play less enjoyable. A sturdy, sharp pair of clippers paired with a calm routine helps deliver clean trims with less splitting and less stress for pets and owners alike. For first-timers, it also helps to learn the basics from trusted pet-care references like the American Veterinary Medical Association (AVMA) and practical trimming guidance from the American Kennel Club (AKC).

Why regular nail trims matter

  • Helps prevent nails from curling into paw pads and reduces pressure on toes.
  • Supports healthier posture and traction on floors, especially for older pets.
  • Reduces scratching injuries and damage to furniture or fabrics.
  • Makes grooming visits easier because pets stay accustomed to handling.

For many dogs, a good rule of thumb is that nails shouldn’t loudly “click” on hard floors. For cats, nails that snag blankets or get caught during play are a sign it’s time for a tidy trim.

What makes a clipper feel “professional” in the hand

  • Blade sharpness and alignment: clean cuts reduce crushing and splitting.
  • Comfort grip and leverage: minimizes hand fatigue during multiple paws.
  • Safety features: a guard can help limit how much nail is removed at once.
  • Build quality: sturdy hinge and consistent spring action for controlled clipping.
  • Size match: the best tool is the one that fits the pet’s nail thickness and the handler’s grip.

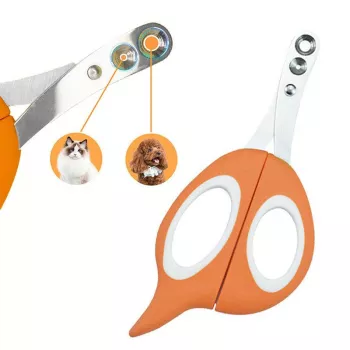
A “professional” feel is less about fancy extras and more about control: the clipper should close smoothly, cut predictably, and stay comfortable in your hand so you can take small, careful snips without rushing.

Professional Pet Nail Clippers: highlights and best uses

If the goal is simple, consistent maintenance at home, a reliable pair of clippers makes the routine easier to repeat (and consistency is what helps most pets relax over time). The Professional Pet Nail Clippers are designed for controlled trimming sessions with a secure grip and dependable cutting action.

  • Designed for controlled trimming sessions at home with a secure grip and reliable cutting action.
  • Good fit for routine maintenance trims, especially when paired with short, frequent sessions.
  • Works best when nails are trimmed in small increments to avoid cutting into the quick.
  • Helpful for households that want a straightforward grooming tool that’s easy to store and clean.
  • Ideal companion items: styptic powder (for accidental nicks), treats, and a bright light for visibility.

After the trim, a calm reset helps keep the grooming “vibe” positive. Something as simple as refreshing water in a dedicated bowl can become part of the routine—many pet parents like keeping supplies together near the grooming area, such as the Ceramic Peach Heart Pet Bowl for quick post-groom hydration.

Quick snapshot: nail clipping decisions that affect comfort and safety

Decision Safer default Why it helps
How much to trim Small slivers at a time Reduces the chance of hitting the quick and keeps pets calmer
Trim frequency More often, less taken off Encourages the quick to recede gradually and avoids big stressful sessions
Pet positioning Stable surface + gentle restraint Improves control and prevents sudden jerks
When nails are dark Use bright light and trim conservatively The quick is harder to see; slower trimming lowers risk
If the pet is anxious One paw per session if needed Builds positive associations without forced handling

How to trim nails calmly (step-by-step routine)

  1. Set up: choose a non-slip surface, good lighting, and have treats ready before starting.
  2. Handle and reward: touch paws briefly, reward, then progress to holding each toe for a few seconds.
  3. Find the safe zone: for light nails, avoid the pink quick; for dark nails, trim tiny amounts and look for a pale inner ring or a dark center dot as a cue to stop.
  4. Clip angle: make a small cut at a slight angle, then reassess; avoid taking a large chunk.
  5. Finish positive: end with praise and a treat, even if only a few nails were done.
  6. If a quick is nicked: apply styptic or cornstarch with gentle pressure; pause the session and keep the pet calm.

For many pets, shorter sessions beat marathon trims. If attention spans run out, stop early and pick up again tomorrow—your pet still “wins” by ending on a calm note.

Common mistakes to avoid

  • Rushing a full trim when the pet is already stressed—short sessions build trust faster.
  • Using dull or misaligned blades—this can crush the nail and increase splintering.
  • Skipping regular trims—waiting too long often leads to longer quicks and more difficult sessions.
  • Trimming immediately after intense exercise—some pets are more reactive when overstimulated.
  • Forcing struggling pets—use breaks, gentle restraint, or ask a groomer/vet for help if needed.

Care, cleaning, and storage

FAQ

How often should a dog or cat’s nails be trimmed?

Many pets do well with trims about every 2–4 weeks, but it depends on growth rate, activity level, and the surfaces they walk on. For dogs, clicking on hard floors is a common sign nails are too long; for cats, frequent snagging on fabric is a helpful clue.

What if my pet has black nails and the quick is hard to see?

Use a bright light and trim tiny slivers rather than taking a large cut. Stop when you see a darker center dot or a change in the nail’s interior texture, and consider getting a groomer or vet demo if you’re new to trimming black nails.

What should be done if the nail bleeds after trimming?

Apply styptic powder (or cornstarch) with gentle pressure and keep your pet calm and still for a moment. If bleeding doesn’t stop after several minutes or your pet seems significantly painful, contact a veterinarian.

Was this article helpful?

Yes No
Leave a comment
Top

Shopping cart

×